QuickStart NUnit. |
| Alex van Buitenen, january 2007. |
NUnit is an open source unit testing framework.
This QuickStart should get you up and running with NUnit in a very short
time.
It assumes you have NUnit installed. If not, you can find it at
www.nunit.org.
Furthermore, basic knowledge about Visual Studio and C# is assumed.
This QuickStart does NOT duplicate any NUnit documentation.
After your QuickStart using this document you should study the NUnit
documentation for more advanced usage.
Introduction.
Creating the Visual Studio solution and projects.
Creating the NUnit Project.
Running NUnit from within
Visual Studio.
NUnit and .NET configuration
Files.
Epilogue.
Appendix1.
Appendix2.
The NUnit documentation does not give any hints where you should put your
unit tests.
It immediately jumps to the attributes you should put in your source-code
without explaining how you should set up your projects.
This QuickStart shows how to set up your projects.
First we will create a Visual Studio Solution "QuickStartNUnit" containing 2 projects:
After that we will create an NUnit project called "QuickStartNUnit.nunit" containing 1 dll:
Figure 1. Overview of the projects and the dll's.
Separating the unit test from the production code gives us 2 obvious advantages:
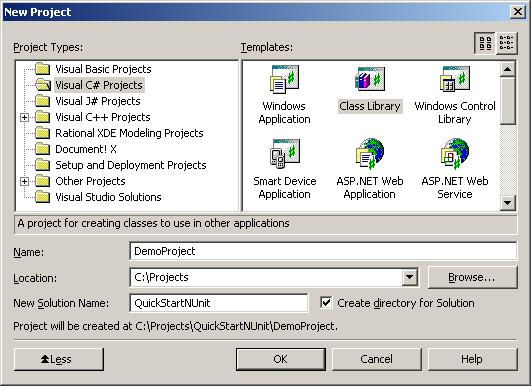
step 1. Creating the solution "QuickStartNUnit" with
project " DemoProject".
step 2. Adding some functionality to "DemoProject".
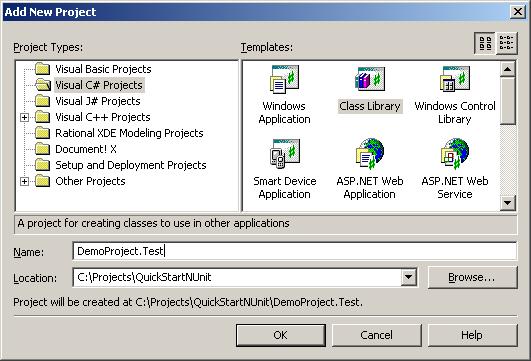
step 3. Creating project "DemoProject.Test".
step 4. Adding a reference to the NUnit Framework.
step 5. Adding a reference to "DemoProject" .
step 6. Adding the Unittests.
Create the Solution "QuickStartNUnit" and project "DemoProject":
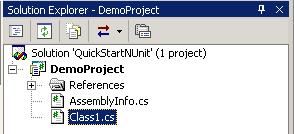
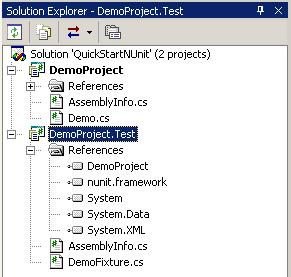
The solution explorer now looks like this:
Now remove Class1.cs and add Demo.cs
(click on filename to view, rightclick to download).
Demo.cs is also listed in Appendix1.
Demo.cs contains the class that has to be tested.
That's it. We have defined the dll which has to be tested.
Next, we will create the dll which will contain the Unit tests.
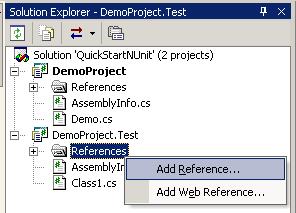
Right click on Solution "QuickStartNUnit" and choose Add,New project:
To be able to use the NUnit Framework, we must add a reference to DemoProject.Test:
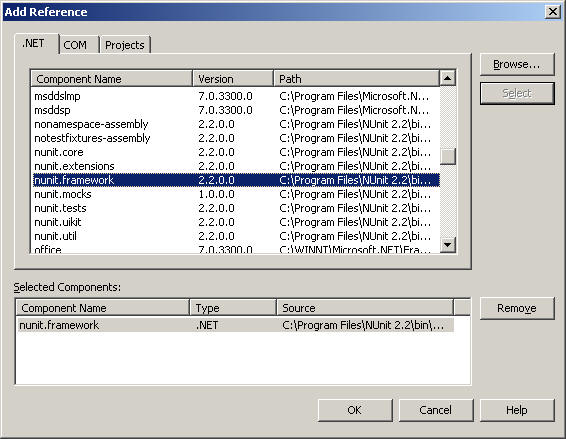
Choose the nunit.framework:
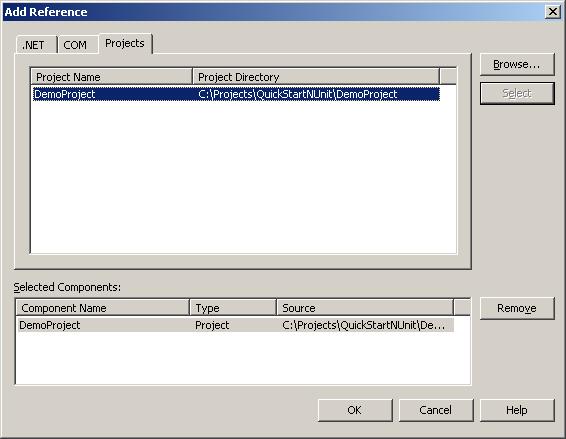
DemoProject.Test will use DemoProject, so add a reference:
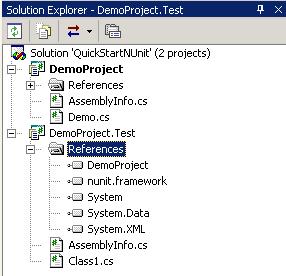
Now DemoProject.Test references DemoProject and the NUnit framework:
Replace Class1.cs by DemoFixture.cs
(click on filename to view, rightclick to download).
Demofixture.cs is also listed in Appendix 2.
Now take a moment to have a look at this file.
You can see that it contains some tests with NUnit specific attributes.
Test1 will be successful, Test2 will fail.
Build the Solution.
That's it. We have created a dll which has to be tested and we created a dll with
Unit tests.
Next, let's examine how to use it.
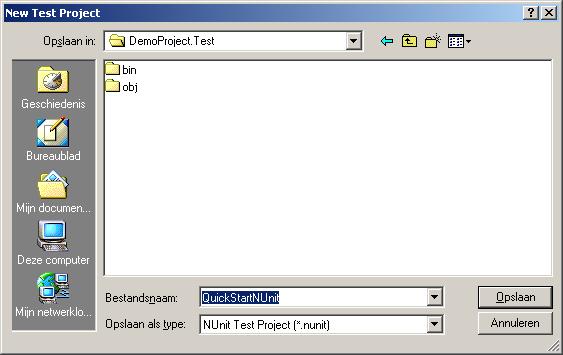
Start NUnit-Gui (should be in your Start menu) and create a new project:

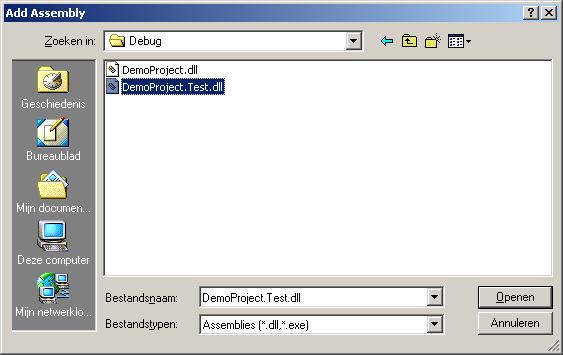
Choose Project, Add Assembly.
Add the dll containing the unittests (DemoProject.Test.dll) to the
NUnit project:
The Unittests appear immediately:
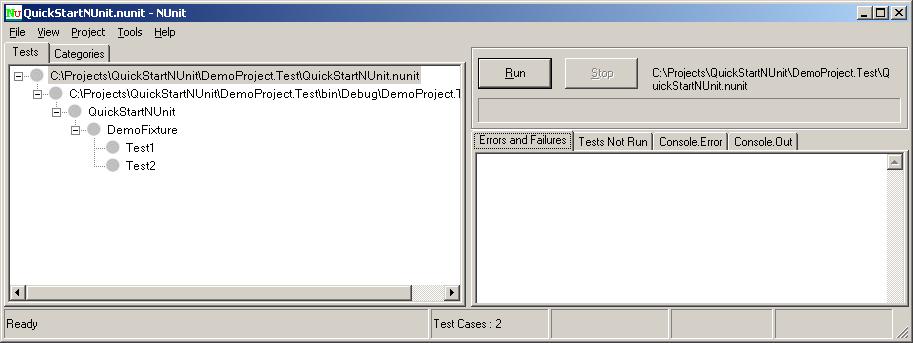
Now press the Run-button:
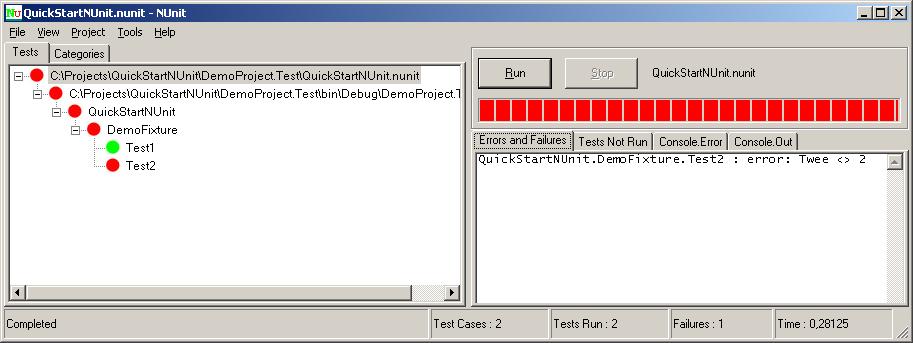
So you have successfully created and run a Unittest!
Now you can have a closer look at DemoFixture.cs
(click on filename to view or rightclick to download).
Demofixture.cs is also listed in Appendix 2.
This provides you with the basic knowledge to get your own unittests up and
running.
For more in-depth information, see the NUnit Documentation (which was placed in
your Start menu by the NUnit installer)
Click here to download the sources and projects in a zip file .
To run NUnit from within Visual Studio, set your Test project as default
startup-project.
Right-click the Test project and choose Properties, Configuration Properties,
Debugging.
Set the debug mode to "Program" and click the "apply" button.
Set the startup program to nunit-gui.exe. (On my computer "C:\Program Files\NUnit
2.2\bin\nunit-gui.exe").
Set the Commandline Argument to your NUnit project file. ("..\..\QuickStartNunit.nunit")
Be careful: the Commandline Argument is case-sensitive.
When you use .NET configuration files, .NET won't be able to find the
configuration file when you test using nunit-gui.exe.
Normally, your app.config gets copied to your <executable file> + ".config".
The problem is that we're not running our own executable, but nunit-gui.exe.
The solution is to copy the app.config to <NUnit project file> + ".config".
You can do this automatically during the Build by right-clicking the Project
file and choose
Properties, Common Properties, Build events and set
Pre-build Event Command Line to something like copy $(ProjectDir)app.config
$(ProjectDir)QuickStartNUnit.config.
You might wonder how to test private methods. After all, we
did put our Unit tests in a separate dll.
For now , it is not directly possible to test private methods. This might seem a
problem in theory, but in practice it isn't.
All private members are called indirectly by the public members.
So private members can be tested indirectly.
When a method is so generic that it has to be tested separately,
it should probably be in a separate toolbox where it should be accessible as a
public member.
If you really disagree with this point of view, see http://www.codeproject.com/csharp/TestNonPublicMembers.asp
using System;
namespace CompanyName.DemoProject
{
///
/// Simple class for NUnit Demo.
///
{
private int _een;
private int _twee;
public Demo()
{
_een = 1;
_twee = 3;
//oops
}
public int Een
{
get
{
return _een;
}
}
public int Twee
{
get
{
return _twee;
}
}
}
}
using System;
using NUnit.Framework; // Uses the NUnit Framework
using CompanyName.DemoProject; // Uses DemoProject that contains the class which
has to be tested.
namespace QuickStartNUnit
{
//*********************************************************************
// This class contains the Unit tests to test the Demo Class. // best practice:
name
// in this case : DemoFixture.
//
//
// It uses the [TestFixture] and [Test] attributes and the
Nunit.Framework.Assert function.
//
//*********************************************************************
[TestFixture] // Use [TestFixture] to mark a class that contains tests
public class DemoFixture
{
[Test]
// Use [Test] to mark this method as a test method for NUnit
public void Test1()
{
Demo demo = new Demo();
//*************************************
// Use the Nunit.Framework.Assert
//*************************************
Assert.IsTrue(demo.Een==1,"error: Een
<> 1");
}
[Test]
public void Test2()
{
Demo demo = new Demo();
//*************************************
// Use the Nunit.Framework.Assert
//*************************************
Assert.IsTrue(demo.Twee==2,"error:
Twee <> 2");
}
// Functions without the [Test] attribute are not seen by
NUnit.
public bool SampleFunctionNotSeenByNUnit()
{
return true;
}
}
}